
Cycling in the winter months
It is dark, it is cold and it is wet. Your bed is comfy and the hot air blower and heated seats of your car are calling you in. It is winter in Manchester and the bike is going rusty in the shed.
But you know what, it doesn’t have to be like that. Winter can be an epic time for cycling. The crisp cool air as the early morning rays of sun dance on the frost and in the bare trees is a sight to behold. The endless blue skies of a clear January day tower above you to infinity (and beyond). There is something a little bit magical about cycling in the winter.
But it is important to be prepared. Yesterday’s defrosting efforts can quickly turn to black ice. A driver setting off with a half defrosted windscreen will have a much bigger blind spot than normal. Your fingers can go numb and make pulling your brakes more challenging in an emergency. Without the right layers and wind protection the cold can make the usually enjoyable ride to work a bit of a painful slog.
But there are a few things you can do, you can buy (or get on freecycle/gumtree) that will go a long way to keeping you safe and warm on the crisp cold winter mornings.
Be seen, be safe, be warm
Visibility doesn’t just mean looking like a Christmas tree, and even if you do look like the lighting department of IKEA you may still find yourself in danger. Below are some tips on how to keep yourself seen, safe and warm on your commute to work.
Be seen
Rule 60 of the Highway Code
“At night your cycle MUST have white front and red rear lights lit. It MUST also be fitted with a red rear reflector (and amber pedal reflectors, if manufactured after 1/10/85). White front reflectors and spoke reflectors will also help you to be seen.”
It goes without saying that a decent set of lights are an absolute must for riding in winter. You will see all sorts of combinations from handlebars to helmet mounted, disco strobe to blinding bright.
As a general rule of thumb it is a good idea to have at least one constant light on the front and back. Just a strobe light can be missed in the split second someone may look in your direction. This constant light can be supplemented by something that strobes or fades in and out to catch the attention of people who are potentially fixated on something else in your direction and miss you. USB chargeable is my preference now as they are more sustainable and quick to charge at my desk.
My own favourite is the Exposure TraceR as it has a setting which is constantly on and also pulses at the same time. This is a small but powerful option that clips to your handlebars with a rubber band and charges in around half an hour. It is plenty bright enough for city use.
I use the Fallowfield Loop on part of my commute and this has no ambient street lighting. For this I need a much more powerful light which is bright enough to light up the way for me to see the entire path. For this I have a Light and Motion Urban 800 which is plenty bright enough, USB chargeable and the battery lasts for several hours on low light which is perfectly fine for what I need.
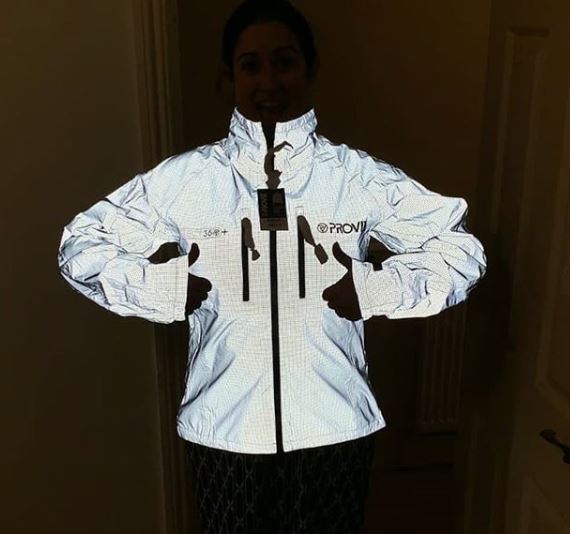
I match this up with the absolutely incredible ProViz Switch jacket. High vis yellow side out for when the visibility is poor but improving. Reflective side out when it is dusk or worsening. Never the reflective side out during daylight though, I see people with the super reflective jackets on during the daytime and they match the road and the endless shades of grey car. I prefer to wear red or blue colours in the daytime.
I’ve also got some reflective spoke covers which create an incredible effect when my spinning wheel catches a headlight from side on, like a disk of light.
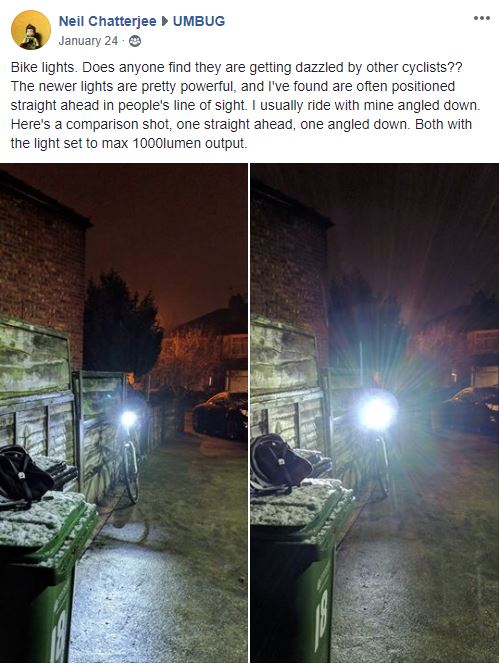
Don’t dazzle drivers
On every evening ride home through the city streets I will see a cyclist with a 2000 lumen monster light disco strobing straight into the eyes of everyone in a 200 metre radius. This is really unhelpful for everyone, including the person who is of the belief that because their light is super bright and pointing straight into everyone’s eyes that they will be seen and safe. Drivers are forced to look away from the road, their vision impeded badly by blinding lights. Other cyclists travelling in the opposite direction also need to avoid looking for oncoming traffic as the lights are too dazzling. This effect is particularly bad when travelling on unlit paths such as the Fallowfield loop where you simply need to look to the side to avoid being temporarily blinded.
The solution is quite simple and is exactly what cars do with their ‘dipped headlights’. Dip the focus of the beam onto the road in front of you so you can see the outline of the main beam on the road. The brightness of this is plenty for other road users to see you and you will not impede all other road users with your lights.
Be safe
Having the right lights and kit isn’t enough to be safe. Defensive riding is a necessity for safe commuting, especially in winter when driver visibility and road conditions are often quite poor.
Never ride in the gutter
Without doubt when you first start cycling it feels safer to ride closer to the curb and out of the way of the cars. However it isn’t necessarily the best place to be. If you look left and there is no room for you to move towards the curb safely out of the way of any danger to the roadside then you have no escape from a driver passing too closely. This part of the road is also where all of the little bits of broken glass, sharp stones and general road litter gathers and causes punctures.
If you are positioned to the left of a car driving in a straight line then it will continue in the same line and pass you, often way too closely. A good position is around the line that a car’s left wheels would normally be. At first this feels like it may be too far out and puts you right in the way of the vehicles behind, but what riding here does is make drivers consciously overtake you, as opposed to maintain a straight line that passes too close to you. Getting used to riding further out also keeps you out of the way of the car door zone.
Avoid the inside of cars at major junctions.
As you start to approach a set of traffic lights or major junction start to think about your position relative to the flow of cars. Is there a car to your immediate right that may want to turn left but may not know you are there? Is there a car speeding up behind you to overtake you quickly? This is often a sign of a car trying to quickly pass you before turning left right in front of you.
Try to be in a position where if a car turns left into your path you are happy you can brake to avoid them, or can move to the right and overtake them between cars. The same applies when filtering up the inside at traffic lights, keep an eye on the lights and when they change try to put yourself between cars where the car behind you can definitely see you and any cars ahead of you can turn safely.
Take the lane.
Taking the lane means putting your bike in a position where you cannot be overtaken by a car. Imagine you are approaching a junction and there is a left turn and a straight ahead lane, but the lanes aren’t wide enough for you and a car. Taking the lane would mean you look and indicate and safely put yourself in the middle of the lane so you don’t get squeezed onto the pavement by a car. You are entitled to do this and it is far safer than ending up in the gutter.
Be warm
The right kit
Cycling kit can be as expensive as you want it to be! Aldi and Decathlon are great places to start building up your supply of kit as you will find that there are several staple items you need for the winter months. Christmas and birthday lists do get a bit easier when you have all of this kit to replace though!
Layers
I have lost count of the amount of times I have reached the first traffic lights on my journey to work and I’m already ripping layers of clothing off. It is really important to avoid overheating and wearing multiple layers you can add and remove and stow away are the best way to achieve this.
The key bits of kit I have in my cupboard are:
- Helmet
- Ear warmers / skull cap / peaked cycling cap
- High vis winter gloves
- Base layers
- Jersey (If you are feeling rich I absolutely wholeheartedly recommend you buy a Castelli Gabba jersey, they are a game changer)
- Waterproof long trousers
- Rubber overshoes – absolutely essential if it is raining on the way to work
- High vis jacket – I love the Proviz Switch as it has a yellow side for dusk and a reflective side for dark
Finally…
A plan in case of emergency
I’m reasonably handy with bike maintenance and a puncture is something I can deal with at the side of the road most of the time. But it is important to know what you would do should you get a puncture on your way home. I actually keep a bike rack on the roof of my car so in a dire emergency when I’m miles from home in the rain my wife can load up the kids and come to the rescue. We had to do that once when I used up 3 inner tubes on one commute – but this is very rare!
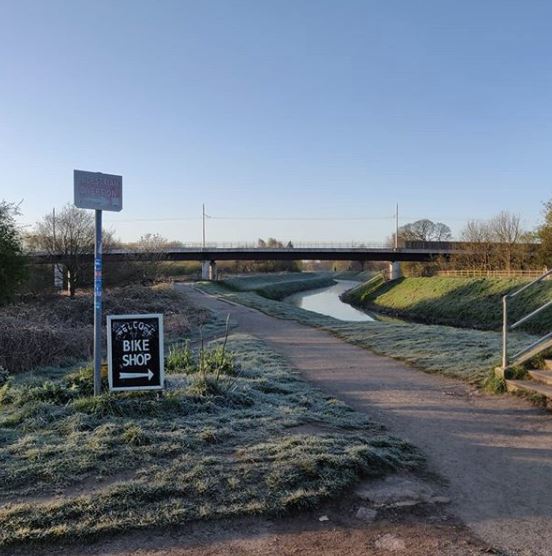
Photo courtesy @ciarantalbot
There are some basics that everyone should carry and learn how to use.
I carry in my bag at all times:
- Tyre levers
- 2 spare inner tubes – I repair the punctured inner tube in the warmth of my house in the evening
- Gas canister inflator (a pump works fine but the canisters are faster)
- Multi tool
- Phone
- A bank card for the train
If you get really stuck you could also try a mobile bicycle repair company such as revolvemcr.com while you take shelter in a pub or café or other suitable safe place.
Written by: Matthew Coupe (UMBUG Projects Team)
Further reading:
TfGM have a great website full of tips here: https://tfgm.com/cycling/safety
British Cycling have a video on correct road positioning here: https://www.britishcycling.org.uk/knowledge/skills/commuting-leisure/article/izn20170317-Commuting—Leisure-Correct-Road-Positioning—Commute-Smart-0
British Cycling have a vault of videos on bike maintenance including changing an inner tube here: https://www.britishcycling.org.uk/knowledge/bike-kit/maintenance